
To create a new template open the Template Editor and click the folder button.

You can create several templates for a given project if there are different kinds of targets you would like to find on a given image. The generated templates are stored with your project when you save it. Note that activating the Select sample mode without an existing template will open the Create New Template dialog automatically.
To select the root folder to store the templates that you generate, select the Browse button. Default location is the root folder of your workspace directory, if you work with projects, your templates are stored in the image folder by default. It is generally not necessary to change this folder location later on, but if you do, you may need to regenerate your templates using the Generate Templates tab.
To delete a template including its samples select the respective button: 
To select the zoom size of selected samples, templates or targets use the Thumbnail zoom in the respective tab.
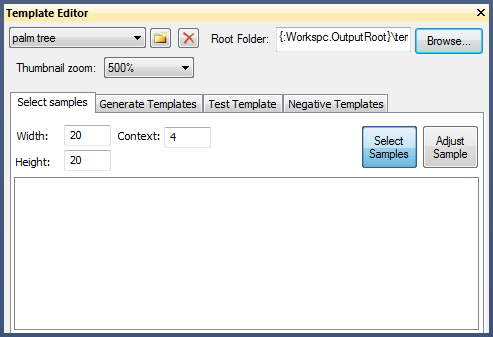
Use the Select samples tab to select examples of your template in the image. Selected samples are stored within the project when you save your project.
To select samples you must activate the Select Samples button. The mouse pointer changes to precision selection mode and the samples can be inserted by a single click into the image. The extent of the sample used for template calculation can be inserted in the fields Width and Height (in pixels). A red rectangle of the selected sample size is drawn around the samples center point. A green line denotes the orientation of the sample. The field Context lets you adjust the size of the displayed image context of your thumbnail preview for better visual evaluation. The context is not considered in the template calculation. The image layer mixing of the thumbnail preview corresponds with the settings of the main view.
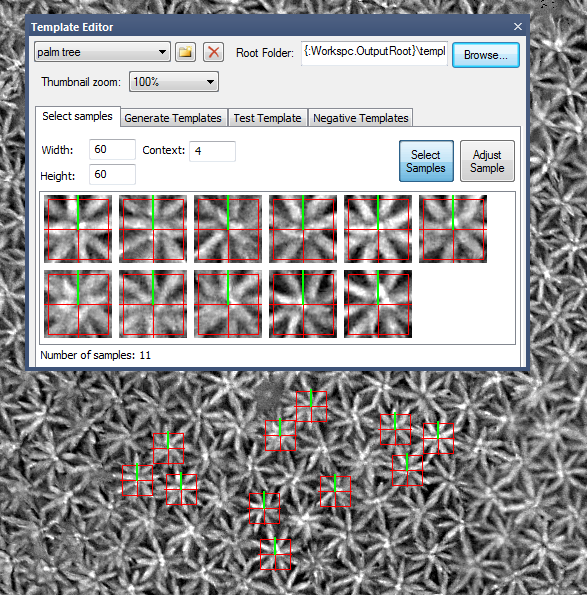
To adjust the position or angle of the sample crosshair activate the Adjust Sample button in the Template Editor dialog and click on a thumbnail to obtain an enlarged visualization of the sample. Now you can shift the crosshair using your left mouse button or rotate it using your right mouse button. Alternatively you can shift a sample also by moving the mouse over the sample the main view until the crosshair color changes to black, and then drag the sample while holding down the left mouse button. (The select samples button must be active.)
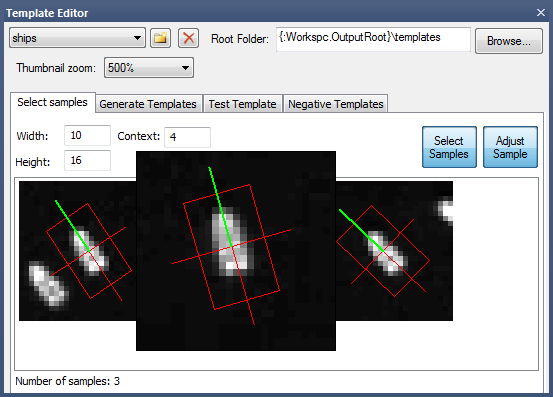
To delete samples right click and select Delete Sample(s) either in the main view (single selection only) or in the thumbnail preview window of the Template Editor (multiple selection possible).
To obtain convincing results you should try to capture the variability that the template displays in actual images. If variability cannot be addressed in a single image, the user is advised to create a multi-scene project and collect samples from different scenes. Note that it is important for template generation that samples are all centered on the same corresponding location.
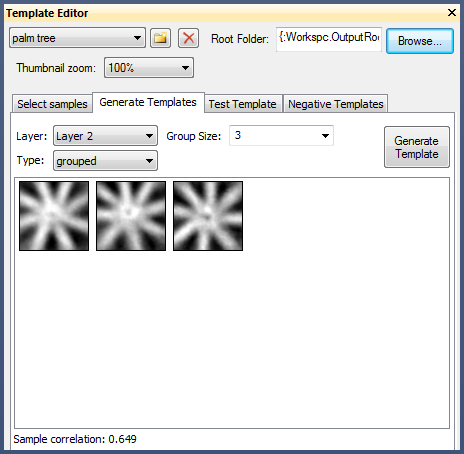
This tab allows you to generate template images. You can select the layer for which the template is generated, and a type parameter.
The simplest template is the mean type. Here the template is generated by computing the mean of all samples. Note that samples are always rotated to have matching axes before they are averaged.
If template type with mask is chosen the algorithm also computes the mean of all samples, but pixels that do not make a positive contribution to the correlation between template and samples are ignored. These ignored pixels are shown in red.
If template type grouped is selected, the algorithm attempts to find subgroups in the samples and creates a separate template for each subgroup. The number of groups to be generated can be defined in the Group size field.
To generate templates click on the Generate Template button. All templates generated are stored separately according to the image layer name selected, template type, and, if applicable, Group Size, e.g. \New Template\Layer2_Group5. (If you want to visualize the templates properly outside eCognition please select an image viewer that supports 32-bit floating image files.)
The generated templates are also displayed in the thumbnail view of the Template Matching dialog. The average correlation coefficient between the template and all samples is displayed at the bottom of the window. Masked pixels (that will be ignored for the matching) are displayed in red. For template groups the maximum correlation between this sample and any of the templates are considered for each sample before averaging across samples.
In this tab you can test a given template on a subregion and identify the targets that are detected with a user-defined threshold. You can then assign the targets as correct or false to obtain an estimate of error rates.
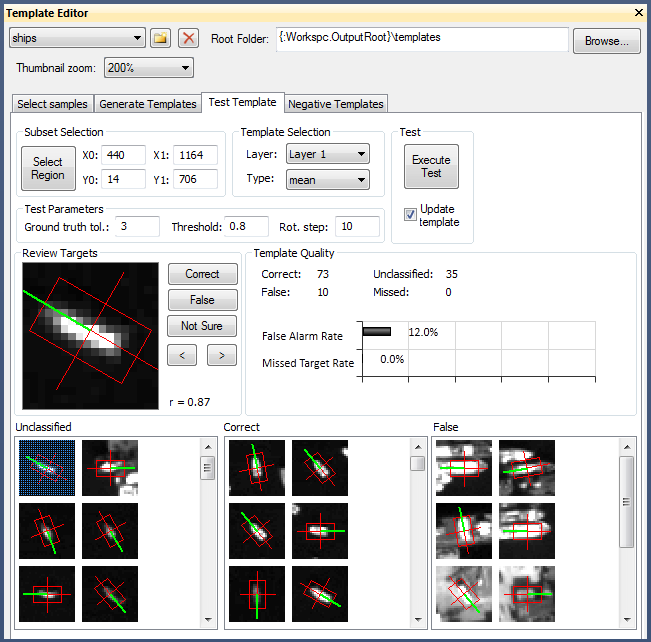
To select a subset for testing activate the Select Region button and then either draw a rectangle in the main view or insert coordinates. To obtain meaningful results for the Template Quality select a region that includes most of your samples (see Template Quality).
Select the layer and template type (and if applicable, group size) used when generating the template.
To start the template matching algorithm, select Execute Test. If Update template is activated, the current template is regenerated based on the current samples before the test is executed. This means that targets that have been classified as “correct” in a previous test run are reflected in the template as well.
After executing, you can assign the test candidates as Correct, False or Not Sure using the respective buttons. The results are shown in the three small windows below: Unclassified, Correct and False. Targets that are classified as correct are automatically added to the samples (see Select Samples tab). The assignments are stored with the project after saving and do not have to be repeated in subsequent tests.
This section of the dialog provides information on the number of correctly, false, unclassified and missed targets and the corresponding false alarm and missed target rate in percent. Note: The missed target rate is accurate only if you have identified all possible samples in your test region. (Otherwise, the software cannot know if targets were missed.)
In this tab, you can create negative templates. Negative templates allow you to improve your results by eliminating false positives.
Before creating a negative template, the user should optimize the actual “positive” (normal) template. The final test with the positive template should be done on a large subregion, using a relatively low threshold, so that many false positives are obtained. Also make sure that all unclassified items that do not reflect correct targets are indeed classified as false.
In the Negative Templates tab click on the Generate Templates button to generate a negative template or template group. The template is generated according to the same algorithm as the positive template, but instead of using the selected samples as a base, it uses the false positives of the last test as a base. You can create negative templates with different group sizes, but you cannot change the layer, as the layer always corresponds to the layer of the current (positive) template. The negative templates are stored inside the folder of the corresponding positive template.
The functionality is otherwise identical to the Generate Templates tab.